Showing posts with label spices. Show all posts

Tuesday, January 4, 2011

Sweet and Sour Chicken

Okay, so I have to start out by saying that I had no parts in coming up with this recipe.  I only succeeded in making it deliciously without many of the items on what I consider to be a sprawling ingredient list, and in a mere portion of the time.  It turned out to be a winner with lean protein, tons of veggies and a sweet but not overly sugary sauce that everyone pretty much loves.*Brushes sugar from shoulder* Now that I'm done bragging about my culinary prowess and chameleon like adaptability in the kitchen, let's move on to the method and ingredient list.

First of all, this recipe is actually for Sweet and Sour Pork (butt) which was changed to chicken. I nixed some of the fresh items like ginger, shortened the marinate time for the chicken and eliminated the deep frying in favor of a saute in a shallow pan of oil. I also omitted the celery because it just seemed wrong to me. Celery? In Sweet and Sour Chicken?


I ended up making substitutions for about half of the ingredients, and it was a smash hit with everyone around the dinner table.  To save money, I pulled two breasts from one whole chicken cut up.  As always I stashed the neck and back in the freezer for stock making, and made the other six pieces into Oven Fried Chicken for another night.  One chicken, two meals, happiness all around!  I will post the recipe with my changes since I think that the ingredients I used are more likely to be found in YOUR fridge/pantry today since you will be making this at your next meal immediately following a thorough reading, commentary and sharing of this post via all of the social networks you are a part of.  You will.  Trust me!

 Sweet and Sour Chicken
2/3 cup soy sauce
2 teaspoons minced garlic
1/2 ground ginger
1/2 cup flour, separated in half
2 chicken breasts, cut into cubes
Kosher salt and pepper
1 tb. oil , plus more for saute (canola, olive, whatever you like)
1 cup ketchup
1/4 cup sugar
1/4 cup red wine vinegar
1 ounce honey
1 tablespoon vegetable oil
1/3 cup large diced onion
1/3 cup carrots sliced 1/4-inch thick, on a bias
1/3 cup large diced red bell pepper
1/3 cup large diced green bell pepper
1/2 can pineapple chunks

1. In a large non-reactive bowl, combine soy, garlic, ginger, and half the flour Season the pork generously with salt and pepper. Place the chicken in the bowl and toss to cover. Marinate in the refrigerator for 1 hr.

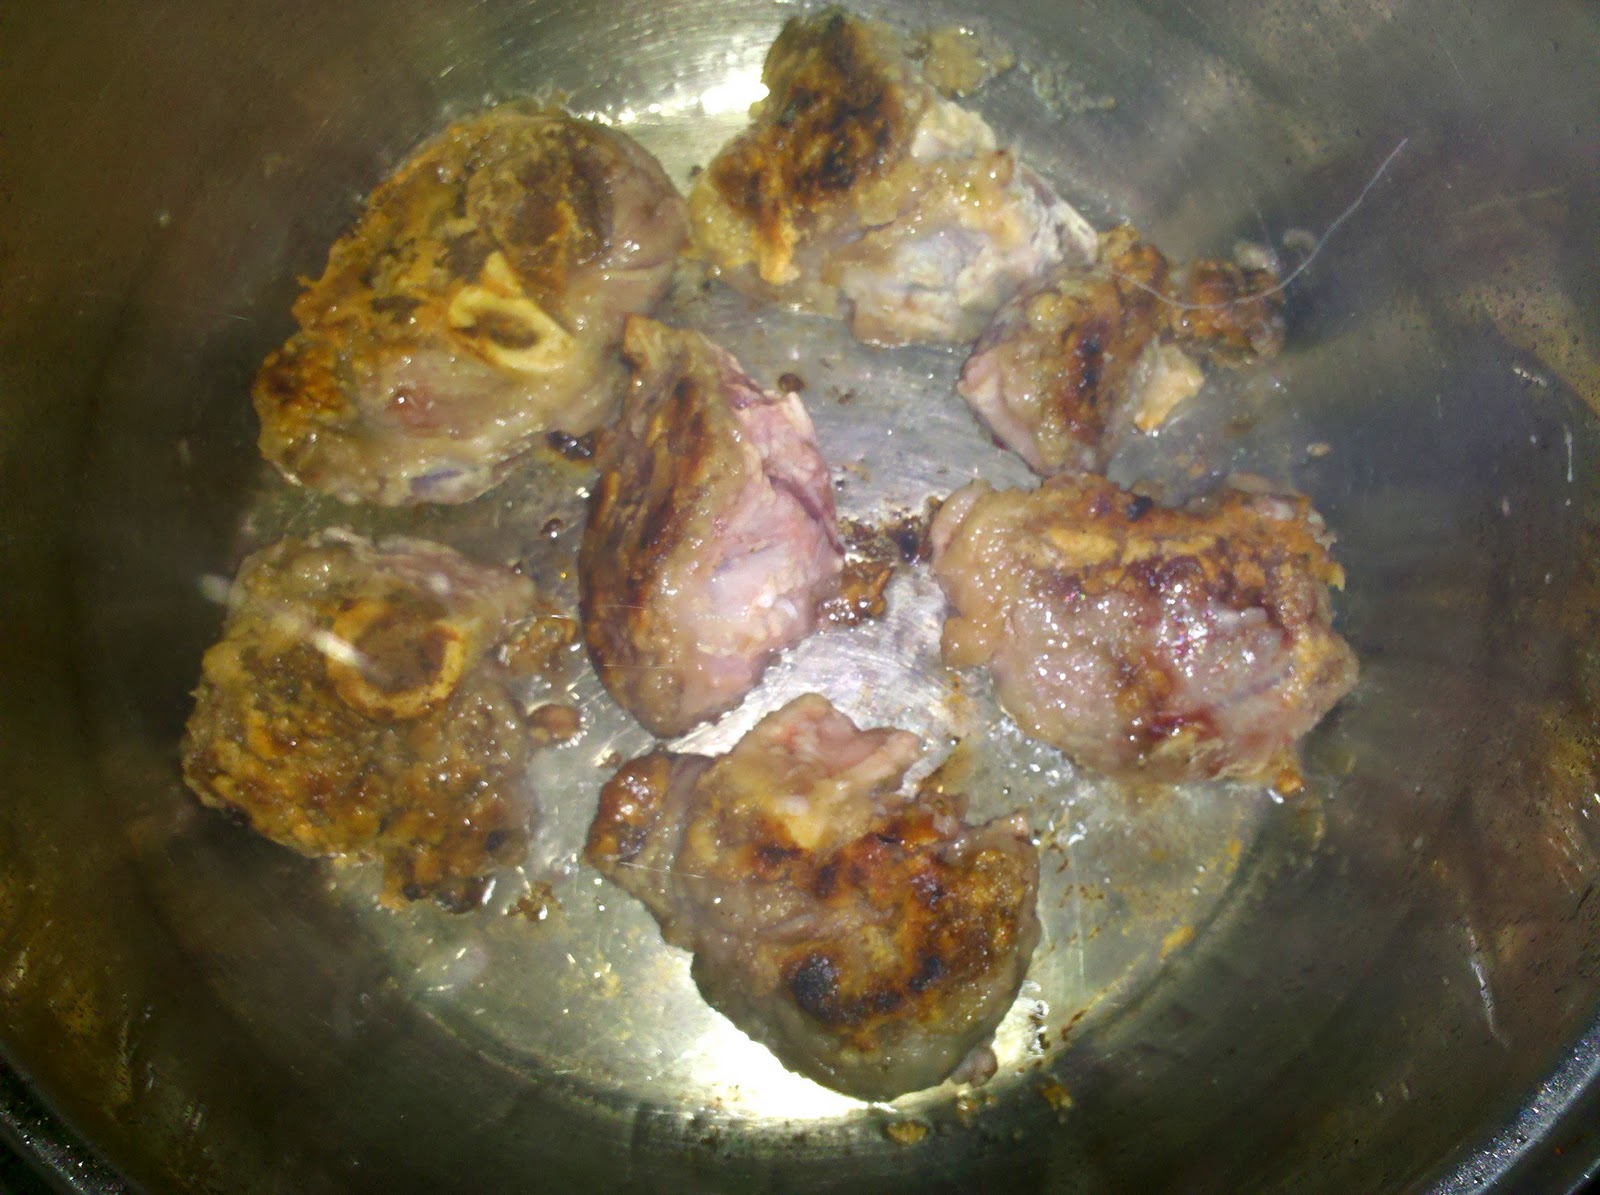
2. Drain off any excess marinade and dredge the chicken in the remaining flour seasoned with salt and pepper. In a large frying pan heat enough oil to cover the pan to 350 degrees F. Fry the chicken in batches until golden brown, flipping each piece half way through. Drain on paper towels. Reserve on a warm plate.

3.In a separate bowl, combine the ketchup, sugar, vinegar, and honey. Whisk to blend.

4. In a small roasting pan heat the tablespoon of oil. Place the vegetables into the pan, allow them to soften for about 2 minutes then add the chicken pieces and cover with the ketchup mixture. Bring to a simmer and cook until the chicken is cooked through.


Tuesday, December 28, 2010

Shrimp Etoufee, The Easy Way

Hello bloggers, sorry it has been so long.  Sometimes life just takes a hold of you and takes you for a ride, ya'll can understand that right? I knew you would :x <----a kiss for you

I went to a wonderful Cajun restaurant in Charlotte called Bordeaux's for Eid, and had a wonderful shrimp etoufee topped with a blackened whitefish.  It was so good I nearly ordered another one.  Not to go, to eat a second time around.  Alas, I decided one day that I would endeavor this dish at home.  When the time came for me to make it, I looked up some recipes and found ones with ingredient lists miles long.  Let the intimidation begin!

I decided to tackle this one on my own, using the ingredients and spices in other recipes as an inspiration for my own.  And guess what? It worked!  I put this dish together in about 20 minutes, then put on some rice while it simmered for about 30 minutes and as though through some divine inspiration everything came together right around the same time.  Rice: perfectly steamed, etoufee: perfectly spicy,warm and the perfect texture.  Best of all, it was easy!

Shrimp Etoufee
Prep Time: 20 mins  Cook Time: 30 minutes
Cost: $9.64      Servings: 4-6

1 lb of cleaned shrimp
1/2 cup oil
1/2 cup flour
1 chopped onion
1/2 green bell pepper, chopped
3 stalks celery, chopped
1 tb. chopped garlic
1- 14.5 oz can chopped tomatoes
1/4 ts. cayenne pepper
1/2 ts. black pepper
1 ts. salt
1/2 ts. garlic powder
1/4 ts. onion powder
1 bay leaf
2 cups water or stock (shrimp if you have it!)

1. Add the flour and oil to a large stockpot or dutch oven to make a roux, and let it cook about 15 minutes until it is a caramel color.  Add the vegetables and garlic then allow them to soften for about 5 minutes.
2. Add in the stock,tomatoes with their juice and all of the spices and stir to combine.  Bring the mixture to a boil and turn down to low heat, simmer for 20 to thirty minutes.
3. Add shrimp and cook for an additional 3 minutes or until the shrimp are cooked.

Print

Tuesday, November 2, 2010

How 'Bout Them Apples! 5 Uses for Homemade Applesauce

It's finally fall in North Carolina.  Granted, the calendar says November 2, but we haven't seen many consecutive cool days until the past week.  And now that the air is crisp and the leaves are so many shades of gold, red and brown it's prime time for apples!


Before a few weeks ago, I never ever had homemade applesauce.  All I ever has was the store bought variety, which I ate and sort of like.  But when I made my own from a bunch of honeycrisp and gala apples, I fell in love and so did Elias. He barely left any for the rest of us! All you do is get a large pot, fill it with your peeled and cored apples, and add enough water to cover.  Add sugar and cinnamon to taste (or maybe brown sugar, or fruit puree...), and cook until the apples reach the desired texture.  If you want some chunky and some a little smoother, remove part of the applesauce when it is chunky and allow the rest to continue to cook down.  I dare even call this a recipe...

Unless you have children, you might think that to make homemade applesauce is more trouble than its worth.  What will you do with such a large quantity? The best part of making things yourself is that you can control the outcome.  You can make your applesauce the texture and level of sweetness you would like, depending on what you will use it for.  I came up with these ways, but I'm sure you can get creative and come up with more of your own.  Comment and let me know what else you came up with!

1.  Yogurt-  Use chunky applesauce as a stir in for plan or vanilla flavored yogurt.  I buy a large container of Stonyfield Farm brand and add the applesauce to sweeten and flavor it.  You save a ton compared to buying the individual cups, especially for organic!

2. Oatmeal-  Add a couple spoonfuls of your chunky applesauce to a pot of oatmeal, or you can even add it to uncooked oats and water to microwave.  Quick, and lots more flavor than those little packets.


3. Fried Pies or apple dumplings-  For a quick fried pie add about 1 tablespoon of filling between two flattened crescent rolls or a rolled out flaky biscuit and fry in hot oil, or use the Pioneer Woman's Recipe for Apple Dumplings using the applesauce instead of sliced apples.  Believe me, you will make these again and again.

4.  Side Dish-  Cooked apples are a great side dish for dinner.  Do you have picky eaters? Sometimes when you can't get them to eat vegetables try a fruit at dinner instead!

5.  Dessert Topping-  Warm up some chunky applesauce with a little caramel and spoon over ice cream or cheesecake.  Then tell yourself it's a serving of dairy and fruit for the day :)

Tuesday, October 19, 2010

Hearty Lamb Stew


Let me start out by saying this: I do not like curry, or rather I have not like it.  This is because the flavors are often too overpowering and aggressive for me.  That might suit someone who is used to these bold flavors, but for me it has always been slightly off putting.  And frankly, it's intimidating.  I am, after all, a Southern bred girl who was never really exposed to international flavors and cuisines until my adult life.  Americanized versions of Chinese, Japanese, Italian and Mexican was pretty much the extent of my adventures in food (Note: let's be clear, these foods are often DAMN tasty!).


Rhymes with Rasheed is another story altogether.  He has eaten many foods from people of many different cuisines and backgrounds, and likes all kids of things that I previously would not even look at, let alone eat.  So this lamb stew is a meeting point for us.  It utilizes lamb, some Eastern spices, and the widely loved flavors of carrots, onions and sweet peas.  Elias loved it -- he ate his first plate before I could dish out everyone else's and then ate two more servings.  The stew went so fast, I ended up eating a PB sandwich afterwards because there was almost none left for me!  The flavor is there, but it's not knocking you over and is a good dish for those of us just starting to experiment with new flavors.

I used cubed lamb shank with the bones in for this, then removed the bones after cooking. But you could easily use any other part of the lamb, or replace with beef or chicken for an equally tasty alternative.  If you wanted to make it vegetarian you can leave out the meat altogether and add potatoes.  Lamb is more expensive than beef or chicken, but since the other ingredients are household staples that most of us typically keep around, the dish is still pretty affordable.  If you don't usually keep tumeric around, check the International foods aisle of your grocery store, you are likely to find smaller packages of spices that are more affordable than the ones on the spice aisle in the fancy glass bottles!

Hearty Lamb Stew
Prep time: 15 minutes     Cook time: 2:30
Price: $12.42         Servings: 4-6

2 lbs. lamb meat
1/4 cup flour
1/2 cup peas
1/4 cup chopped carrots
1/4 cup chopped onions
1 large garlic clove, chopped
1 1/2 ts. tumeric
pinch of allspice
pinch of cumin
kosher salt and black pepper to taste

1. Preheat a stock pot over medium-high heat and drizzle with oil.
2. Season the meat with salt and pepper, and dust with the flour to coat.  
3. Brown the meat in batches, and remove them from the pan.  Add the onions and garlic and soften.
4. Return the meat to the pan, and add enough water to cover. Then add the carrots, peas, tumeric, allspice, cumin and salt and pepper to taste.  
5. Cover and cook over high heat for 20 minutes, then reduce to a simmer for at least two hours. Serve hot over rice.

Friday, October 15, 2010

Make Your Own...Sausage!


Some people think I'm crazy for wanting to make as many things as I can myself.  I make EVERYTHING I possibly can from scratch for three reasons: 1. I like to eliminate as many additives in food, household items, etc. from my life (and the environment) as I can. 2. I am crafty, and it saves money. 3. I enjoy taking on an insane amount of projects that I may or may not get around to.  So I'm going to start posting "Make Your Own" ideas that can help you cleanse your home and the environment, save money and commit to projects that you may or may not get around to, too!


Sausage is one of those things that I try to stay away from in the store.  It's packed with sodium, additives for freshness and color, and sometimes fillers.  This is a quicky way of making sausage; if you own a meat grinder do it the old-fashioned way by all means but I don't.  So this is a shortcut, five minute way of making sausage for the rest of us.  If I'm making a breakfast sandwich I made them thin an big enough to cover my bread of choice.  I used 1/2 lb 93/7 ground turkey and 1/2 lb 96/4 ground beef, but you can use whatever you have on hand.  And a sidenote: only use the rolls of ground meat at the store.  The snakey looking stuff doesn't have the right texture and it WILL crumble and fall apart on you. Trust me :/  Also, if you use really lean meat like I did, you might want to add a tiiiny bit of oil to the pan, to help with browning.


Sausage Seasoning
Prep Time: 3 minutes       Cook time: 3-4 minutes
Cost $2.18                         Servings: 4-6
1 lb. ground turkey, ground beef or a combination
1 ts. ground sage
1 1/4 ts. salt
1/2 ts. garlic powder
pinch of onion powder
1/2 ts. crushed red pepper


1. Place meat in a bowl, add all spices and mix thoroughly.  Cover with plastic wrap and use within 2 days.

Monday, October 11, 2010

Beef Vegetable Stew with Black Pepper and Cheese Croutons


When the weather is getting cool, there's nothing quite like a big bowl of something warm and good, and this beef vegetable stew really hit the spot.  But then when you add in the black pepper and cheese croutons, things really start to get good.  Really, super comforting.

My husband isn't a very big fan of light fare like soups and salads when dinner time rolls around.  I'm trying to slowly change his mind and offer lighter alternatives, but he loved this traditional stew with the twist of the black pepper and cheese croutons.  When you think about it, Americans are one of the few cultures that I know of that eat their biggest meal of the day in the evening.  The Spanish are infamous for their leisurely lunches known as la comida,the largest meal of their day, in the late afternoon and then enjoy a siesta, their afternoon nap which can last up to two hours (wouldn't that be nice!).  With all of that said, I am trying to keep as many meals as light as possible.  You can make this with any combination of your favorite vegetables, or leave out the meat altogether. This stew and cheesy crouton was just the right combination: light, but filling and oh so good!

Beef Vegetable Stew
Prep time: 15 minutes Cook time: 30 minutes
Cost $6.57    Servings: 6+

1/2 of a zucchini, chopped and cubed
3/4 c. corn kernels
1/2 an onion, finely chopped
1/2 cup carrots, cubed, shredded or grated
3 medium potatoes, peeled and cubed
1/2 pound stew meat or beef, in 1/2 inch cubes
2 tablespoons olive oil
kosher salt and black pepper
1 teaspoon garlic powder, or 2 cloves of garlic
1/2 teaspoon onion powder
1- 28 oz. can crushed tomatoes
1- 28 oz. can petite diced tomatoes
2 tablespoons tomato paste

1. Heat the olive oil over medium heat in a large pot until it glistens and ripples.
caramelized onions
2. Brown the meat, adding it to the pan so that there is space between each piece.  If necessary, cook the meat in batches but be sure not to overcrowd the pan. Remove from pan.

3. Add the onion and fresh garlic if you're using it, and soften the onions then add the meat back to the pot.
4.Add the crushed and diced tomatoes, the tomato paste, garlic and onion powder and season with salt and pepper. Let the mixture heat through, then add the potatoes.
5. Wait 5 minutes, and add the zucchini, corn and carrots.
6.Leave the soup as is, or mix two tablespoons of flour with 1 tablespoon of butter or butter substitute in a small dish until combined and add it to the soup to thicken the texture.  Cover and on medium-low heat for 25 minutes. 
Print


Black Pepper and Cheese Croutons

1/2 loaf of thin sliced Italian bread
3 tablespoons grated Parmesan cheese
croutons with olive oil1/4 cup Mozzarella or Italian blend cheese
cracked black pepper
olive oil for drizzling

1.Preheat the oven to 425 degrees. 
2.Spread the bread out on a sheet pan, and drizzle with olive oil.
3.Bake the bread for 8-10 minutes, or until the bread is browned and crisp on top.
4.Add the mozzarella or Italian cheese, then the Parmesan cheese, and top with a sprinkle of black pepper. 
5.Return to the oven for another 5-7 minutes or until the cheese is melted, bubbly and brown.  Eat. Enjoy.

Print

Sunday, October 10, 2010

"Hidden Veggie" Chili and Perfect Skillet Cornbread


Fall is absolutely my favorite season.  Sometimes it's still warm during the day, you can wear a jacket or not, and you can have a great day outdoors and have something warm and tasty in a bowl for dinner.  So because it was fall, and for no other particular reason, I made an old-fashioned chili and cornbread dinner.
When I told Shaheid (a.k.a. "Rhymes with Rasheed") that I was making chili I got one of those "Oh no..." looks.  He then proceeds to tell me that he thought that HE was the chili maker in our house, because it's not one of my strong suits. After I finished rolling my eyes and quickly reminded him about the time he microwaved two ribeyes in an effort to defrost them, I started my chili.  I decided to add some "hidden veggies" to the recipe because there is no such thing as too many vegetables especially when your two year old and your husband (or whatever picky eater is in your life) don't even know they're there!  I used 96/4 ground beef and didn't miss the great flavor of it's fattier friends with all of the great spices in this dish.

I made a few changes to a skillet cornbread recipe from The Pioneer Woman, adding some sugar to the recipe and subbing in fat-free and low fat dairy.  The edges were crispy and the inside was soft and a tiiiny bit sweet, just what I'm looking for in a great skillet cornbread.  If you don't have cast iron pan, try using a cake pan or other baking pan and heating it in the oven as it preheats.  That should get you as close as you can get to the same crispy crust achieved in cast iron.  P.S. I wish I had a piece right NOW!


Hidden Veggie Chili
  • 1 lb. lean ground beef
  • 1/4 cup shredded zucchini
  • 1/4 cup shredded carrot
  • 1/2 an onion, diced
  • 3 tb. ground chilies (or chili powder)
  • 1/4 ts. cayenne pepper
  • 1/4 ts. cumin
  • 1/4 ts. onion powder
  • 1 ts. salt
  • 1 1/2 ts. garlic powder
  • 1 - 28 oz. can crushed tomatoes
  • 1 - 28 oz. can petite diced tomatoes
Instructions

In a large pot over medium heat, brown the ground beef and drain any excess liquid.
Add the onion and allow them to soften for 3 to 4 minutes.
Add the zucchini and carrot and cook for an additional two minutes.
Next add the crushed and diced tomatoes with all their juices.
Heat the mixture through, add the spices and cook over medium-low heat for 20 to 30 minutes.


Perfect Skillet Cornbread
adapted from The Pioneer Woman
  • 1 cup Yellow Cornmeal
  • ½ cups All-purpose Flour
  • 1 teaspoon Salt
  • 1 Tablespoon Baking Powder
  • 2 tablespoons sugar
  • 1 cup fat-free Buttermilk
  • ½ cups 1% Milk
  • 1 whole Egg
  • ½ teaspoons Baking Soda
  • ¼ cups Shortening
  • 2 Tablespoons Shortening

Preparation Instructions

Preheat oven to 450 degrees.
Combine cornmeal, flour, salt, and baking powder in a bowl. Stir together.
Measure the buttermilk and milk in a measuring cup and add the egg. Stir together with a fork. Add the baking soda and stir.
Pour the milk mixture into the dry ingredients. Stir with a fork until combined.
In a small bowl, melt 1/4 shortening. Slowly add melted shortening to the batter, stirring until just combined. In an iron skillet, melt the remaining 2 tablespoons shortening over medium heat. Pour the batter into the hot skillet. Spread to even out the surface. (Batter should sizzle.)
Cook on stovetop for 1 minute, then bake for 20 to 25 minutes or until golden brown.
Edges should be crispy!


Monday, October 4, 2010

Spicy Oven Fried Chicken


Sunday was a very long day for me, I was trying out all kinds of new recipes so that I can tell you all about them. From sunrise ( I LITERALLY stayed up after Fajr on a Sunday morning!) until sunset (yes, until Maghrib) I was in the kitchen doing a few experiments. This one is a tweak on the oven fried chicken I make all the time. The spice in this is excellent because it's not "in YO FAAACE!" kind of hot. It's flavorful, spicy kick kind of hot and even little Elias had no problem gobbling up a leg.
Spicy Oven Fried Chicken

1 whole chicken, cut up
or
4 boneless skinless chicken breasts
1 box of panko bread crumbs
2 eggs
1/2 cup milk
non-stick spray

Brine
1 tablespoon salt
1/4 teaspoon of onion powder
1/4 teaspoon garlic powder
1 teaspoon poultry seasoning
1 teaspoon Italian seasoning
1 teaspoon crushed red pepper
pinch of cayenne pepper
2 teaspoons of Worcestershire (I used extra tenderizing)
enough water to cover all chicken pieces

Dredging Flour
2 cups of flour
1/2 teaspoon salt
1/4 teaspoon pepper
1/4 teaspoon garlic powder
1/4 teaspoon onion powder
pinch of cayenne pepper

Preheat the oven to 375 degrees. Prepare your pan with a coat of non-stick spray, either a wire cooling rack on a sheet pan or casserole dish, or use a broiler pan.In a large bowl, place all chicken pieces and add enough water to submerge all pieces. Add the brine ingredients, and cover with plastic wrap. Refrigerate, or, if it's a cool day you can leave it on a countertop for about 1 hour.

Next, prepare a dredging station with three large mixing bowls. In the first bowl mix all of the ingredients for the dredging flour. In the second bowl, mix the eggs and milk until combined. Pour the entire box of panko in the third bowl.

Once the chicken has brined, remove it from the liquid and shake off any excess water before dropping each piece, two at a time, into the dredging flour. Coat each piece, then dip it in the egg mixture, and finally in the panko shaking off any excess coating and placing them on the prepared pan as you go.  After all the pieces are coated and placed on the pan, spray each piece with the non-stick spray. Bake at 375 for 35-45 minutes, or until the chicken is golden brown and firm to the touch and at an internal temperature of 165 degrees.

I love this two-part recipe because the brine makes the chicken extra juicy and flavorful, and the panko bread crumbs add a wonderful crunch that makes you not even miss the greasy fried stuff.  By adding flavor and texture in each layer of the recipe, the final product is super flavorful.  Unlike some oven fried chicken recipes which call for flash frying the chicken before finishing it in the oven, this recipe skips the deep frying altogether making it a much healthier alternative especially if you opt for the chicken breasts.  The other great thing about this recipe is that it works for chicken pieces with and without skin! Whatever you like!  If you are using a cooling rack for this, make sure that the chicken is suspended above the pan or else the bottom of the chicken will be soggy. Make sure that each piece is completely and evenly coated in each step so that the crust is neither too heavy (it will fall off in clumps, believe me) or if there are large spaces without all three layers the juices from the chicken will spill out and make the whole thing mushy. One last tip: You can put the dredging flour and panko in a shopping bag (paper or plastic? It's up to you!) for easy clean up!

P.S. Sorry there are no step by step photos, I was kind of in a rush!

Sunday, October 3, 2010

Simple Pleasures: On Black Pepper

The other day I dragged out my double stroller and took my children for a walk, and it was truly a fall day. The air was cool, a pleasant breeze kissed their noses, and I didn't pass out while pushing the two of them up the many hills in our neighborhood. I looked at the trees and smelled the fresh air, and really took time to appreciate the outdoors. Then I thought about pepper.

I know it's weird. Pepper is generally considered to be a sharp, hot-ish kind of flavor that makes you sneeze if it's fiery smoke reaches your nose. But I was blessed with a recent chain of events that led me to really appreciate something small, that I use,touch and look at nearly everyday.

About a week ago, my pepper mill broke. I tried to refill it and when I screwed off the top some sort of spring popped out and that was the end, it died a quick and springy death. But I was in the middle of making something (I'm sure it was very good) so I NEEDED pepper. I took out my Ninja
and whizzed some whole peppercorns, and was surprised by what I encountered when I opened the lid. 

The pepper I saw, smelled, and felt was not the same powdery mess found on so many store shelves.  That must be the dust leftover from making the real stuff, which I had right in my hands.  Some of the pieces were big, others were small.  It was a mixture of black, white, and gray tones.  It smelled floral, even fruity, far from the "Ah-choo!" that we've all encountered before.  It was awkward, awe-inspiring and average all at the same time.  But sometimes, it's just the little things.  Next time you get the chance, wake up and smell the cracked black pepper.