Showing posts with label garlic. Show all posts

Tuesday, January 4, 2011

Sweet and Sour Chicken

Okay, so I have to start out by saying that I had no parts in coming up with this recipe.  I only succeeded in making it deliciously without many of the items on what I consider to be a sprawling ingredient list, and in a mere portion of the time.  It turned out to be a winner with lean protein, tons of veggies and a sweet but not overly sugary sauce that everyone pretty much loves.*Brushes sugar from shoulder* Now that I'm done bragging about my culinary prowess and chameleon like adaptability in the kitchen, let's move on to the method and ingredient list.

First of all, this recipe is actually for Sweet and Sour Pork (butt) which was changed to chicken. I nixed some of the fresh items like ginger, shortened the marinate time for the chicken and eliminated the deep frying in favor of a saute in a shallow pan of oil. I also omitted the celery because it just seemed wrong to me. Celery? In Sweet and Sour Chicken?


I ended up making substitutions for about half of the ingredients, and it was a smash hit with everyone around the dinner table.  To save money, I pulled two breasts from one whole chicken cut up.  As always I stashed the neck and back in the freezer for stock making, and made the other six pieces into Oven Fried Chicken for another night.  One chicken, two meals, happiness all around!  I will post the recipe with my changes since I think that the ingredients I used are more likely to be found in YOUR fridge/pantry today since you will be making this at your next meal immediately following a thorough reading, commentary and sharing of this post via all of the social networks you are a part of.  You will.  Trust me!

 Sweet and Sour Chicken
2/3 cup soy sauce
2 teaspoons minced garlic
1/2 ground ginger
1/2 cup flour, separated in half
2 chicken breasts, cut into cubes
Kosher salt and pepper
1 tb. oil , plus more for saute (canola, olive, whatever you like)
1 cup ketchup
1/4 cup sugar
1/4 cup red wine vinegar
1 ounce honey
1 tablespoon vegetable oil
1/3 cup large diced onion
1/3 cup carrots sliced 1/4-inch thick, on a bias
1/3 cup large diced red bell pepper
1/3 cup large diced green bell pepper
1/2 can pineapple chunks

1. In a large non-reactive bowl, combine soy, garlic, ginger, and half the flour Season the pork generously with salt and pepper. Place the chicken in the bowl and toss to cover. Marinate in the refrigerator for 1 hr.

2. Drain off any excess marinade and dredge the chicken in the remaining flour seasoned with salt and pepper. In a large frying pan heat enough oil to cover the pan to 350 degrees F. Fry the chicken in batches until golden brown, flipping each piece half way through. Drain on paper towels. Reserve on a warm plate.

3.In a separate bowl, combine the ketchup, sugar, vinegar, and honey. Whisk to blend.

4. In a small roasting pan heat the tablespoon of oil. Place the vegetables into the pan, allow them to soften for about 2 minutes then add the chicken pieces and cover with the ketchup mixture. Bring to a simmer and cook until the chicken is cooked through.


Tuesday, December 28, 2010

Shrimp Etoufee, The Easy Way

Hello bloggers, sorry it has been so long.  Sometimes life just takes a hold of you and takes you for a ride, ya'll can understand that right? I knew you would :x <----a kiss for you

I went to a wonderful Cajun restaurant in Charlotte called Bordeaux's for Eid, and had a wonderful shrimp etoufee topped with a blackened whitefish.  It was so good I nearly ordered another one.  Not to go, to eat a second time around.  Alas, I decided one day that I would endeavor this dish at home.  When the time came for me to make it, I looked up some recipes and found ones with ingredient lists miles long.  Let the intimidation begin!

I decided to tackle this one on my own, using the ingredients and spices in other recipes as an inspiration for my own.  And guess what? It worked!  I put this dish together in about 20 minutes, then put on some rice while it simmered for about 30 minutes and as though through some divine inspiration everything came together right around the same time.  Rice: perfectly steamed, etoufee: perfectly spicy,warm and the perfect texture.  Best of all, it was easy!

Shrimp Etoufee
Prep Time: 20 mins  Cook Time: 30 minutes
Cost: $9.64      Servings: 4-6

1 lb of cleaned shrimp
1/2 cup oil
1/2 cup flour
1 chopped onion
1/2 green bell pepper, chopped
3 stalks celery, chopped
1 tb. chopped garlic
1- 14.5 oz can chopped tomatoes
1/4 ts. cayenne pepper
1/2 ts. black pepper
1 ts. salt
1/2 ts. garlic powder
1/4 ts. onion powder
1 bay leaf
2 cups water or stock (shrimp if you have it!)

1. Add the flour and oil to a large stockpot or dutch oven to make a roux, and let it cook about 15 minutes until it is a caramel color.  Add the vegetables and garlic then allow them to soften for about 5 minutes.
2. Add in the stock,tomatoes with their juice and all of the spices and stir to combine.  Bring the mixture to a boil and turn down to low heat, simmer for 20 to thirty minutes.
3. Add shrimp and cook for an additional 3 minutes or until the shrimp are cooked.

Print

Friday, November 5, 2010

Pizza and Pondering on a Friday Night


Sometimes I ask myself why I blog.  I am not no more of an extraordinary home cook than many bloggers online.  I don't necessarily always cook the most elaborate meals, or the most exotic.  And I certainly don't often have access to the finest ingredients money has to buy.  But I do know what I CAN do.  I can stretch 2 chickens into four meals for four people.  I can create entire meals under $5.  I can mix organic and natural foods in my family's diet on a budget.  I can make delicious food that doesn't require any level of cooking skill, intricate tools or a lot of time.  And I can certainly love the feeling I get when I go into the kitchen and make something so good that I feel like someone else needs to know about it!  So I will continue to try my best to bring you recipes, information and tips that get me through my day to day trials in the kitchen, and beyond.........Whew! With all that said, let's talk about pizza.


I don't know many people who have a whole lot of luck at making really good homemade pizza dough.  I love pizza but there's nothing I hate more than shelling out $30 for a pizza night and getting some suck-a$$ pizza! It's always 50/50 with these pizza places, sometimes a hit and sometimes a major, major miss.  Actually for me it's more like an 80/20 miss-hit ratio.  So after some research online, I found a great dough recipe and made pizza without even getting out a pot for the sauce! Not to mention the obvious health benefits of making your own food as opposed to eating out, and saving MAJOR dough (<-----pun intended).

Happy Helper/Eater #1
Happy Eater #2


The best thing about this dough recipe is that it is so simple, and can be ready to bake in an hour if you wait until the last minute on a weeknight.  Or you could fancy it up with toppings for a girls' night or game day with the guys.  If you make it ahead, this is literally at 15 minute, $5 dinner kind of night.  It also works well regardless if you like thick or thin crust.  Some variations I made on this recipe:
  • I also substituted instant yeast for active dry yeast.  If you have instant yeast, you don't even have to start the yeast in warm water, just add it in with the dry ingredients before adding to the wet.  
  • I also par-baked the crust for about 7 minutes before adding the toppings to prevent sogginess.  
  • For the sauce, I opened a can of crushed tomatoes and spooned it onto the crust, then sprinkled lightly with garlic powder, a pinch of salt, and a sprinkle of Italian seasoning. Add movie and enjoy!

 Prep Time: 5 min + 1 hr proof time    Cook time: 15 minutes
Cost:  $6.23 for two pizzas       Servings: 2 large pizzas
  • 2 1/4 teaspoons active dry yeast (I substituted instant)
  • 1/2 teaspoon brown sugar
  • 1 1/2 cups warm water (110 degrees F/45 degrees C)
  • 1 teaspoon salt
  • 2 tablespoons olive oil
  • 3 1/3 cups all-purpose flour
  1. In a large bowl, dissolve the yeast and brown sugar in the water, and let sit for 10 minutes.(Skip if using instant yeast)
  2. Stir the salt and oil into the yeast (or water/sugar) solution. Mix in 2 1/2 cups of the flour, adding instant yeast to flour if you're subbing for active dry.
  3. Turn dough out onto a clean, well floured surface, and knead in more flour until the dough is no longer sticky. Place the dough into a well oiled bowl, and cover with a cloth. Let the dough rise until double; this should take about 1 hour. Punch down the dough, and form a tight ball. Allow the dough to relax for a minute before rolling out. Use for your favorite pizza recipe.
  4. Preheat oven to 500 degrees F (220 degrees C). If you are baking the dough on a pizza stone, you may place your toppings on the dough, and bake immediately. If you are baking your pizza in a pan, lightly oil the pan, and let the dough rise for 15 or 20 minutes before topping and baking it.
  5. Bake pizza in preheated oven, until the cheese and crust are golden brown, about 15 to 20 minutes.

Tuesday, October 19, 2010

Hearty Lamb Stew


Let me start out by saying this: I do not like curry, or rather I have not like it.  This is because the flavors are often too overpowering and aggressive for me.  That might suit someone who is used to these bold flavors, but for me it has always been slightly off putting.  And frankly, it's intimidating.  I am, after all, a Southern bred girl who was never really exposed to international flavors and cuisines until my adult life.  Americanized versions of Chinese, Japanese, Italian and Mexican was pretty much the extent of my adventures in food (Note: let's be clear, these foods are often DAMN tasty!).


Rhymes with Rasheed is another story altogether.  He has eaten many foods from people of many different cuisines and backgrounds, and likes all kids of things that I previously would not even look at, let alone eat.  So this lamb stew is a meeting point for us.  It utilizes lamb, some Eastern spices, and the widely loved flavors of carrots, onions and sweet peas.  Elias loved it -- he ate his first plate before I could dish out everyone else's and then ate two more servings.  The stew went so fast, I ended up eating a PB sandwich afterwards because there was almost none left for me!  The flavor is there, but it's not knocking you over and is a good dish for those of us just starting to experiment with new flavors.

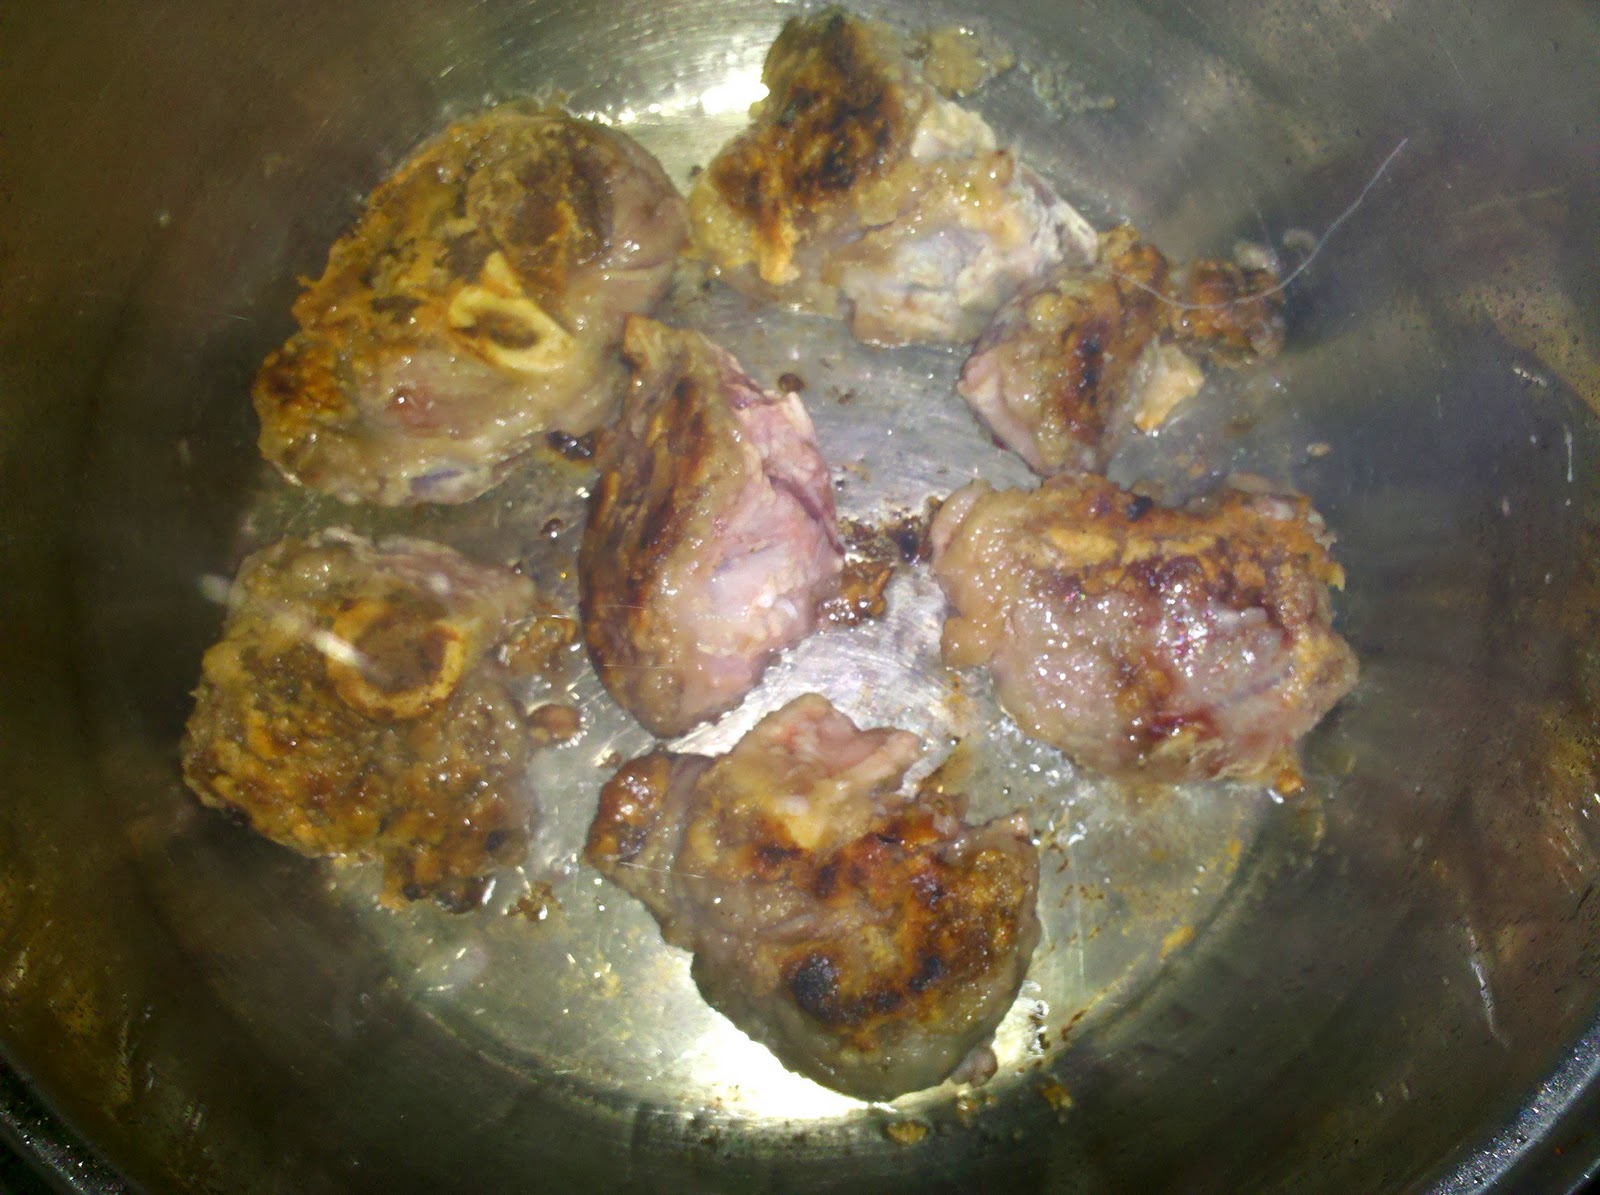
I used cubed lamb shank with the bones in for this, then removed the bones after cooking. But you could easily use any other part of the lamb, or replace with beef or chicken for an equally tasty alternative.  If you wanted to make it vegetarian you can leave out the meat altogether and add potatoes.  Lamb is more expensive than beef or chicken, but since the other ingredients are household staples that most of us typically keep around, the dish is still pretty affordable.  If you don't usually keep tumeric around, check the International foods aisle of your grocery store, you are likely to find smaller packages of spices that are more affordable than the ones on the spice aisle in the fancy glass bottles!

Hearty Lamb Stew
Prep time: 15 minutes     Cook time: 2:30
Price: $12.42         Servings: 4-6

2 lbs. lamb meat
1/4 cup flour
1/2 cup peas
1/4 cup chopped carrots
1/4 cup chopped onions
1 large garlic clove, chopped
1 1/2 ts. tumeric
pinch of allspice
pinch of cumin
kosher salt and black pepper to taste

1. Preheat a stock pot over medium-high heat and drizzle with oil.
2. Season the meat with salt and pepper, and dust with the flour to coat.  
3. Brown the meat in batches, and remove them from the pan.  Add the onions and garlic and soften.
4. Return the meat to the pan, and add enough water to cover. Then add the carrots, peas, tumeric, allspice, cumin and salt and pepper to taste.  
5. Cover and cook over high heat for 20 minutes, then reduce to a simmer for at least two hours. Serve hot over rice.

Monday, October 11, 2010

Beef Vegetable Stew with Black Pepper and Cheese Croutons


When the weather is getting cool, there's nothing quite like a big bowl of something warm and good, and this beef vegetable stew really hit the spot.  But then when you add in the black pepper and cheese croutons, things really start to get good.  Really, super comforting.

My husband isn't a very big fan of light fare like soups and salads when dinner time rolls around.  I'm trying to slowly change his mind and offer lighter alternatives, but he loved this traditional stew with the twist of the black pepper and cheese croutons.  When you think about it, Americans are one of the few cultures that I know of that eat their biggest meal of the day in the evening.  The Spanish are infamous for their leisurely lunches known as la comida,the largest meal of their day, in the late afternoon and then enjoy a siesta, their afternoon nap which can last up to two hours (wouldn't that be nice!).  With all of that said, I am trying to keep as many meals as light as possible.  You can make this with any combination of your favorite vegetables, or leave out the meat altogether. This stew and cheesy crouton was just the right combination: light, but filling and oh so good!

Beef Vegetable Stew
Prep time: 15 minutes Cook time: 30 minutes
Cost $6.57    Servings: 6+

1/2 of a zucchini, chopped and cubed
3/4 c. corn kernels
1/2 an onion, finely chopped
1/2 cup carrots, cubed, shredded or grated
3 medium potatoes, peeled and cubed
1/2 pound stew meat or beef, in 1/2 inch cubes
2 tablespoons olive oil
kosher salt and black pepper
1 teaspoon garlic powder, or 2 cloves of garlic
1/2 teaspoon onion powder
1- 28 oz. can crushed tomatoes
1- 28 oz. can petite diced tomatoes
2 tablespoons tomato paste

1. Heat the olive oil over medium heat in a large pot until it glistens and ripples.
caramelized onions
2. Brown the meat, adding it to the pan so that there is space between each piece.  If necessary, cook the meat in batches but be sure not to overcrowd the pan. Remove from pan.

3. Add the onion and fresh garlic if you're using it, and soften the onions then add the meat back to the pot.
4.Add the crushed and diced tomatoes, the tomato paste, garlic and onion powder and season with salt and pepper. Let the mixture heat through, then add the potatoes.
5. Wait 5 minutes, and add the zucchini, corn and carrots.
6.Leave the soup as is, or mix two tablespoons of flour with 1 tablespoon of butter or butter substitute in a small dish until combined and add it to the soup to thicken the texture.  Cover and on medium-low heat for 25 minutes. 
Print


Black Pepper and Cheese Croutons

1/2 loaf of thin sliced Italian bread
3 tablespoons grated Parmesan cheese
croutons with olive oil1/4 cup Mozzarella or Italian blend cheese
cracked black pepper
olive oil for drizzling

1.Preheat the oven to 425 degrees. 
2.Spread the bread out on a sheet pan, and drizzle with olive oil.
3.Bake the bread for 8-10 minutes, or until the bread is browned and crisp on top.
4.Add the mozzarella or Italian cheese, then the Parmesan cheese, and top with a sprinkle of black pepper. 
5.Return to the oven for another 5-7 minutes or until the cheese is melted, bubbly and brown.  Eat. Enjoy.

Print

Monday, June 28, 2010

So, About that Roasted Garlic


I mentioned roasted garlic and roasted garlic oil in my last post, Italian Sausages with Peppers and Onions and Spicy Marinara. It is so simple to make, easy to store and can bring a whole other level of flavor to things that you would regularly use garlic and/or olive oil for. To me, the best kinds of foods are simple but have layers of flavor, meaning that each part of the dish brings something to the party. Roasted garlic is sweet and not as strong as raw garlic so it gives foods a wonderful flavor without overpowering other ingredients. A great way to use roasted garlic is to use the softened cloves to spread on toasted bread.

What You'll Need:
1 head of garlic
1/2 cup olive oil
aluminum foil or a baking dish

Oven roasting:Cut off the top of the head of garlic like this . Put the entire head of garlic in a dish with a lid, or in 2 or 3 layers of foil, about 8 x 8 inches depending on the size of the head. Pour the oil over the head of garlic, letting it seep into the crevices between the cloves. Either cover or use the foil to create a pocket for the garlic by gathering the edges and turning them over. Roast at 375 for about 20 minutes, or until the garlic is golden brown and soft. To remove the cloves, squeeze the the head of garlic from the bottom (the uncut side) and all of the softened pieces will come right out.

Pan roasting: Remove the individual cloves from the head of garlic and add them with the oil in a skillet over low heat. Allow the garlic to caramelize and soften for about 20 minutes.

Remove the head of garlic or garlic cloves from the oil and store them both in the refrigerator in a sealed container for up to two weeks.