Showing posts with label chicken. Show all posts

Tuesday, January 4, 2011

Sweet and Sour Chicken

Okay, so I have to start out by saying that I had no parts in coming up with this recipe.  I only succeeded in making it deliciously without many of the items on what I consider to be a sprawling ingredient list, and in a mere portion of the time.  It turned out to be a winner with lean protein, tons of veggies and a sweet but not overly sugary sauce that everyone pretty much loves.*Brushes sugar from shoulder* Now that I'm done bragging about my culinary prowess and chameleon like adaptability in the kitchen, let's move on to the method and ingredient list.

First of all, this recipe is actually for Sweet and Sour Pork (butt) which was changed to chicken. I nixed some of the fresh items like ginger, shortened the marinate time for the chicken and eliminated the deep frying in favor of a saute in a shallow pan of oil. I also omitted the celery because it just seemed wrong to me. Celery? In Sweet and Sour Chicken?


I ended up making substitutions for about half of the ingredients, and it was a smash hit with everyone around the dinner table.  To save money, I pulled two breasts from one whole chicken cut up.  As always I stashed the neck and back in the freezer for stock making, and made the other six pieces into Oven Fried Chicken for another night.  One chicken, two meals, happiness all around!  I will post the recipe with my changes since I think that the ingredients I used are more likely to be found in YOUR fridge/pantry today since you will be making this at your next meal immediately following a thorough reading, commentary and sharing of this post via all of the social networks you are a part of.  You will.  Trust me!

 Sweet and Sour Chicken
2/3 cup soy sauce
2 teaspoons minced garlic
1/2 ground ginger
1/2 cup flour, separated in half
2 chicken breasts, cut into cubes
Kosher salt and pepper
1 tb. oil , plus more for saute (canola, olive, whatever you like)
1 cup ketchup
1/4 cup sugar
1/4 cup red wine vinegar
1 ounce honey
1 tablespoon vegetable oil
1/3 cup large diced onion
1/3 cup carrots sliced 1/4-inch thick, on a bias
1/3 cup large diced red bell pepper
1/3 cup large diced green bell pepper
1/2 can pineapple chunks

1. In a large non-reactive bowl, combine soy, garlic, ginger, and half the flour Season the pork generously with salt and pepper. Place the chicken in the bowl and toss to cover. Marinate in the refrigerator for 1 hr.

2. Drain off any excess marinade and dredge the chicken in the remaining flour seasoned with salt and pepper. In a large frying pan heat enough oil to cover the pan to 350 degrees F. Fry the chicken in batches until golden brown, flipping each piece half way through. Drain on paper towels. Reserve on a warm plate.

3.In a separate bowl, combine the ketchup, sugar, vinegar, and honey. Whisk to blend.

4. In a small roasting pan heat the tablespoon of oil. Place the vegetables into the pan, allow them to soften for about 2 minutes then add the chicken pieces and cover with the ketchup mixture. Bring to a simmer and cook until the chicken is cooked through.


Tuesday, October 19, 2010

Hearty Lamb Stew


Let me start out by saying this: I do not like curry, or rather I have not like it.  This is because the flavors are often too overpowering and aggressive for me.  That might suit someone who is used to these bold flavors, but for me it has always been slightly off putting.  And frankly, it's intimidating.  I am, after all, a Southern bred girl who was never really exposed to international flavors and cuisines until my adult life.  Americanized versions of Chinese, Japanese, Italian and Mexican was pretty much the extent of my adventures in food (Note: let's be clear, these foods are often DAMN tasty!).


Rhymes with Rasheed is another story altogether.  He has eaten many foods from people of many different cuisines and backgrounds, and likes all kids of things that I previously would not even look at, let alone eat.  So this lamb stew is a meeting point for us.  It utilizes lamb, some Eastern spices, and the widely loved flavors of carrots, onions and sweet peas.  Elias loved it -- he ate his first plate before I could dish out everyone else's and then ate two more servings.  The stew went so fast, I ended up eating a PB sandwich afterwards because there was almost none left for me!  The flavor is there, but it's not knocking you over and is a good dish for those of us just starting to experiment with new flavors.

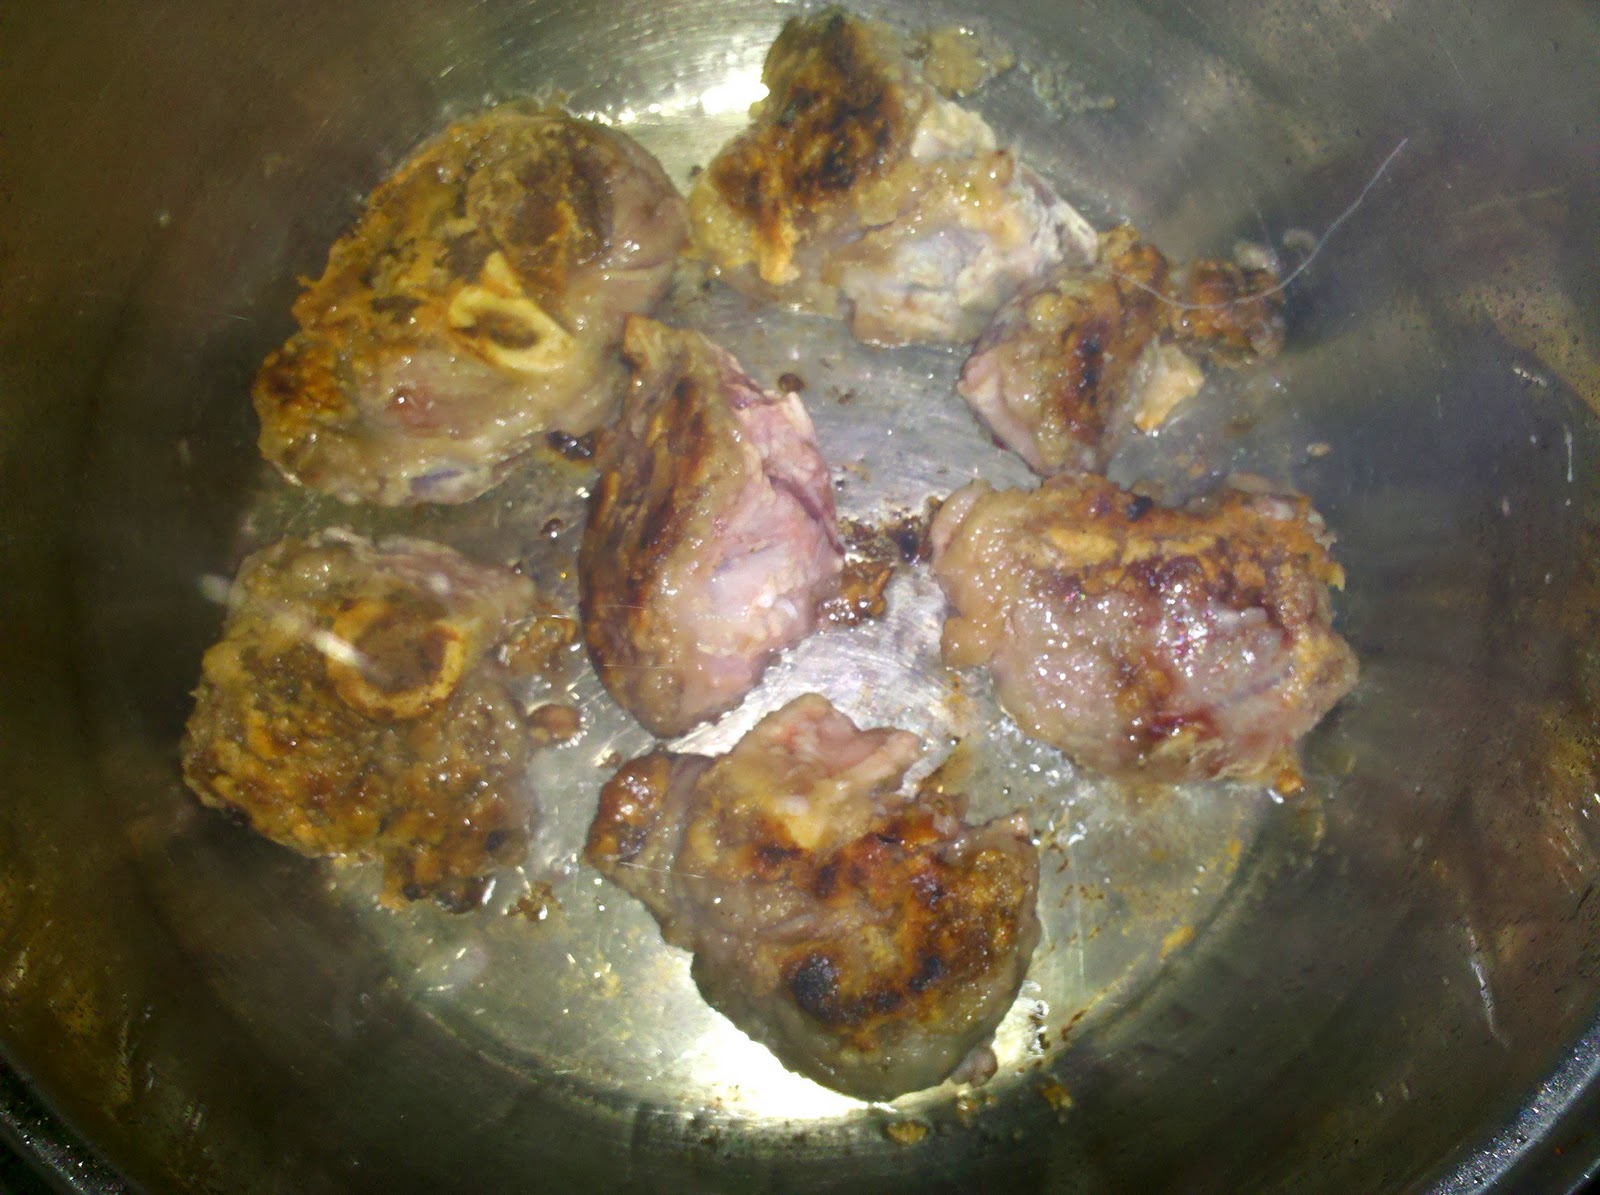
I used cubed lamb shank with the bones in for this, then removed the bones after cooking. But you could easily use any other part of the lamb, or replace with beef or chicken for an equally tasty alternative.  If you wanted to make it vegetarian you can leave out the meat altogether and add potatoes.  Lamb is more expensive than beef or chicken, but since the other ingredients are household staples that most of us typically keep around, the dish is still pretty affordable.  If you don't usually keep tumeric around, check the International foods aisle of your grocery store, you are likely to find smaller packages of spices that are more affordable than the ones on the spice aisle in the fancy glass bottles!

Hearty Lamb Stew
Prep time: 15 minutes     Cook time: 2:30
Price: $12.42         Servings: 4-6

2 lbs. lamb meat
1/4 cup flour
1/2 cup peas
1/4 cup chopped carrots
1/4 cup chopped onions
1 large garlic clove, chopped
1 1/2 ts. tumeric
pinch of allspice
pinch of cumin
kosher salt and black pepper to taste

1. Preheat a stock pot over medium-high heat and drizzle with oil.
2. Season the meat with salt and pepper, and dust with the flour to coat.  
3. Brown the meat in batches, and remove them from the pan.  Add the onions and garlic and soften.
4. Return the meat to the pan, and add enough water to cover. Then add the carrots, peas, tumeric, allspice, cumin and salt and pepper to taste.  
5. Cover and cook over high heat for 20 minutes, then reduce to a simmer for at least two hours. Serve hot over rice.

Monday, October 4, 2010

Spicy Oven Fried Chicken


Sunday was a very long day for me, I was trying out all kinds of new recipes so that I can tell you all about them. From sunrise ( I LITERALLY stayed up after Fajr on a Sunday morning!) until sunset (yes, until Maghrib) I was in the kitchen doing a few experiments. This one is a tweak on the oven fried chicken I make all the time. The spice in this is excellent because it's not "in YO FAAACE!" kind of hot. It's flavorful, spicy kick kind of hot and even little Elias had no problem gobbling up a leg.
Spicy Oven Fried Chicken

1 whole chicken, cut up
or
4 boneless skinless chicken breasts
1 box of panko bread crumbs
2 eggs
1/2 cup milk
non-stick spray

Brine
1 tablespoon salt
1/4 teaspoon of onion powder
1/4 teaspoon garlic powder
1 teaspoon poultry seasoning
1 teaspoon Italian seasoning
1 teaspoon crushed red pepper
pinch of cayenne pepper
2 teaspoons of Worcestershire (I used extra tenderizing)
enough water to cover all chicken pieces

Dredging Flour
2 cups of flour
1/2 teaspoon salt
1/4 teaspoon pepper
1/4 teaspoon garlic powder
1/4 teaspoon onion powder
pinch of cayenne pepper

Preheat the oven to 375 degrees. Prepare your pan with a coat of non-stick spray, either a wire cooling rack on a sheet pan or casserole dish, or use a broiler pan.In a large bowl, place all chicken pieces and add enough water to submerge all pieces. Add the brine ingredients, and cover with plastic wrap. Refrigerate, or, if it's a cool day you can leave it on a countertop for about 1 hour.

Next, prepare a dredging station with three large mixing bowls. In the first bowl mix all of the ingredients for the dredging flour. In the second bowl, mix the eggs and milk until combined. Pour the entire box of panko in the third bowl.

Once the chicken has brined, remove it from the liquid and shake off any excess water before dropping each piece, two at a time, into the dredging flour. Coat each piece, then dip it in the egg mixture, and finally in the panko shaking off any excess coating and placing them on the prepared pan as you go.  After all the pieces are coated and placed on the pan, spray each piece with the non-stick spray. Bake at 375 for 35-45 minutes, or until the chicken is golden brown and firm to the touch and at an internal temperature of 165 degrees.

I love this two-part recipe because the brine makes the chicken extra juicy and flavorful, and the panko bread crumbs add a wonderful crunch that makes you not even miss the greasy fried stuff.  By adding flavor and texture in each layer of the recipe, the final product is super flavorful.  Unlike some oven fried chicken recipes which call for flash frying the chicken before finishing it in the oven, this recipe skips the deep frying altogether making it a much healthier alternative especially if you opt for the chicken breasts.  The other great thing about this recipe is that it works for chicken pieces with and without skin! Whatever you like!  If you are using a cooling rack for this, make sure that the chicken is suspended above the pan or else the bottom of the chicken will be soggy. Make sure that each piece is completely and evenly coated in each step so that the crust is neither too heavy (it will fall off in clumps, believe me) or if there are large spaces without all three layers the juices from the chicken will spill out and make the whole thing mushy. One last tip: You can put the dredging flour and panko in a shopping bag (paper or plastic? It's up to you!) for easy clean up!

P.S. Sorry there are no step by step photos, I was kind of in a rush!

Monday, June 28, 2010

Roasted Lemon Chicken


I made this chicken on my cooking day that I wrote about in a previous post. Everybody eats chicken because it's generally good and good for you, but we've all had a very dry and unappealing chicken every now and again. I reheated this chicken in the oven by putting it in a 350 oven for about 15 minutes after taking it straight from the freezer. I don't think cooking gets more simple than this! You can even throw in some roasted garlic if you'd like :)

What You'll Need:
1 whole roasting chicken
1 lemon
olive oil
kosher salt and black pepper


Split the chicken in half using a knife or a pair of kitchen shears so that you have two halves. Pat each half dry on the top (formerly the outside) and bottom (formerly the inside). Start with each half skin side down and drizzle with olive oil, then give it a good sprinkling of salt and pepper. Turn over and repeat on the skin side. Roll the lemon to release the juices, and if it's really unripe microwave it for about 10 seconds so you will get all the juice. Cut the lemon in half, using the juice from each half to pour over half of the chicken. Then cut each lemon half into slices. Stick a few slices under each half of chicken, and put the rest on top. Roast at 400 for about an hour and a half, depending on the size of your chicken. There are three ways to tell if your chicken is done, some more specific than others :)

1.A good rule of thumb is 20 minutes per pound, plus fifteen minutes.
2.Or you could use a thermometer to check for an internal temperature of 165 degrees in the upper thigh area, making sure not to touch the bone.
3.Or you could use a quick method of twisting the leg bone. If it twists freely and the juices run clear, the chicken is done; if there is some tension let it cook longer.

After the chicken is done, cover with a piece of foil to allow juices to redistribute before cutting. If you want to freeze it, let it cool completely and wrap each half separately in several layers of plastic wrap before using one layer to wrap them together as if the chicken were whole again. Then take the cooled juices from the pan, and double bag them in a Ziploc bag and freeze them along with your chicken. Thaw the juices in the microwave then pour over the chicken before heating to re-crisp the skin.

Wednesday, June 2, 2010

Back With a Vengeance


After my last colossal fail at stir fry, I thought I would steer clear from Asian inspired dishes for a while. But, alas, I have revisited the flavors of the Far East once again and this time it was greeeeeeeeeeeeat. And yes I needed all of those "e"s.

After a request for chicken wings for dinner, I intended to make BBQ chicken wings. Until I went to the fridge and didn't find the ketchup bottle refilled with my own BBQ sauce, or any other remnant of BBQ sauce in the fridge. So I had to improvise. I opened the cabinet and what's the first thing I see? Soy sauce. I ran with it and this is what transpired.

Asian BBQ Sauce for Wings (or anything else for that matter)
1/4 cup soy sauce
1/4 cup ketchup
1/2 cup water
1 tb. red wine vinegar
2 tb. honey
3 tb. brown sugar
1 garlic clove, minced
1 pinch of ground ginger

Add all of the above to a pan on medium heat. Reduce until the sauce thickens, but still has a liquid consistency about 10 minutes. Remove from heat and pour into a bowl or container with a lid.

The makings of the sauce...

The sauce after!
I prepared my wings in a very simple way. First, preheat the oven to 425. I spread them out on a cooling rack placed over a baking sheet, then patted them dry with a paper towel. (Remember, it is unnecessary to rinse chicken since that only liquefies germs and spread them alllll around the kitchen in places you might not even think to look!) Then I seasoned them with kosher salt and freshly ground pepper, putting pepper only on the side that would be face down since pepper can scorch easily when placed under direct heat. Bake for about 20 minutes if you are using wing sections, longer if you are using whole wings. Then crank up the broiler and broil the wings on each side for about two minutes or until the skin crisps and turns golden brown. Remove then and toss in the sauce in the covered container.

Chicken before...
Chicken after!

The Sides:

1 zucchini, sliced into 2 inch sections
1/2 onion, chopped
2 cups cold brown rice
2 slices turkey bacon
1 egg
2 tb. soy sauce or a fried rice seasoning packet


While the wings are baking, you can make some zucchini fry up some brown rice like I did. To make this a one pan wonder, add 1 ts. olive oil to a pan over medium high heat. Add in sliced zucchini, salt and pepper it, and saute until softened and a little brown, about 3 minutes. Remove the zucchini and let the pan come back to temperature. If you don't have cold, leftover rice in the fridge you can expedite the process by making some instant rice in the microwave and spreading it out on a baking sheet and putting it in the fridge for about 20 minutes. Be sure that your rice is COLD, or else it will break up and be a big, mushy mess! Once your rice is ready dice two slices of turkey bacon, and add it to the pan. Then add the chopped onion and cook for another minute. Add an egg, salt and pepper it, and scramble it. At this point I added in a Kikkoman's fried rice seasoning packet, or you could just add a couple tablespoons of soy sauce. Add in the rice and, then cook for another minute and that's all folks. Be sure to use a sizable pan that will allow the rice to maintain a high temperature once it is added.

Rice before...

Rice after!

T

You WILL want to make this for your family, your boo, or whoever. It makes a great, fast meal when the "summer=no cooking" syndrome hits and the pressure is on :) Not to mention there is NO ADDED FAT! 'Til next time.

Finished product!